
IN PROGRESS · DRONE BUILD
WoodHawk:
A father-daughter drone build.
A laser-cut frame. A shared experiment. An idea taking flight.
Building a drone from scratch with my 11-year-old daughter—and documenting what we learn along the way.
BUILD YOUR OWN · IN DEVELOPMENT
Want to build WoodHawk?
The planned download includes laser-cut frame files, illustrated assembly instructions, and a bill of materials with sourcing links. The design still needs assembly and flight testing before release.
Leave your email for the release announcement. No release date or price has been set.
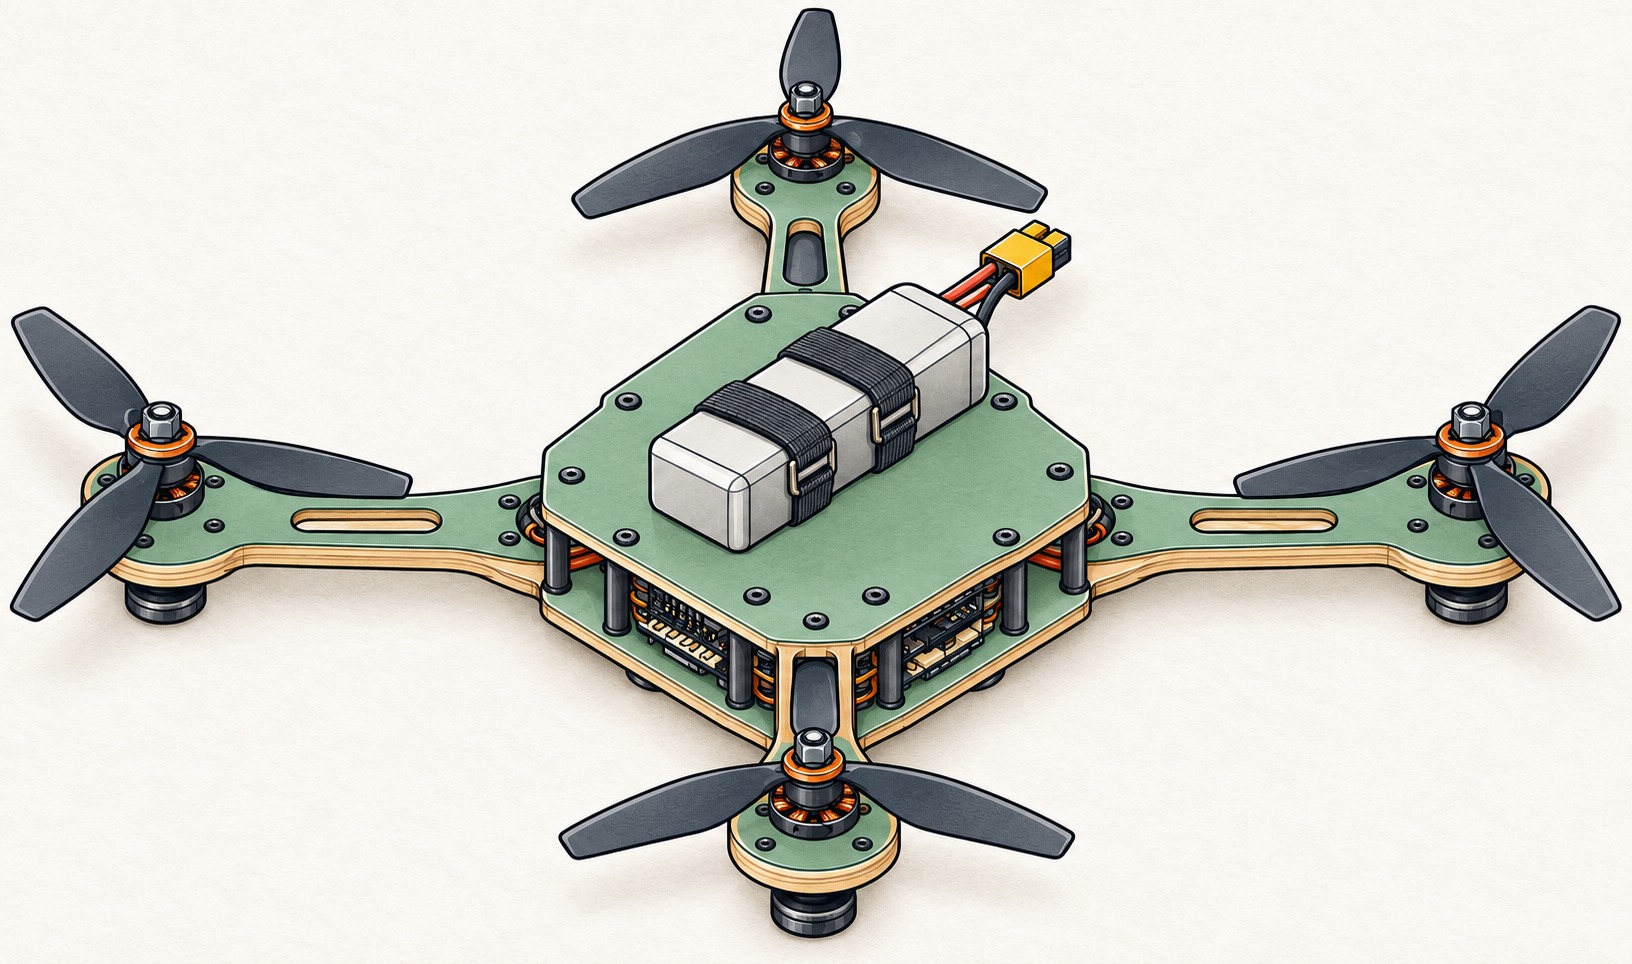
290 × 290 × 65 mm
About one pound; estimate, not yet measured.
DESIGN UPDATE · VERSION 1.11 · OCTOBER 6, 2026
Eleven iterations.
Time to make the first cuts.
WoodHawk has been through eleven rounds of iteration. So far, the work has been about refining the design on screen. Next, I’ll laser-cut sample pieces and see how the real parts fit as the electronics are selected and become available.
I’ve also been thinking beyond the first build. The frame assembly needs room to evolve, and I’m planning for a potential future camera mount. A camera is a possibility for a later version, rather than a feature I’m committing to for the first flight.
The current design is approximately 11.4 inches long, 11.4 inches wide, and 2.5 inches tall (290 × 290 × 65 mm). I expect the final flying weight to land around 460 grams—16.2 ounces, or roughly a pound. The scale will tell us how close that estimate is.
From the drawing to the bench.
The sample cuts are our first chance to test the fit before committing to the full frame. After that comes assembly, finishing, and a series of weigh-ins to track what each stage adds. Only then do we move into motor testing and the first flight attempt.
THE FIRST CHAPTER · BY JEREMY DARTY
Why build our own?
I’ve been interested in drones for years, but I’ve never quite taken the leap. Lately, I’ve been seeing more inexpensive DIY kits: laser-cut wooden parts, electronics in a box, and everything ready to assemble.
They look like a fun introduction. But with an xTool S1 40W laser cutter already in my workshop, I keep thinking: why not make the frame ourselves?
That question became WoodHawk—a drone project I’m taking on with my 11-year-old daughter.
From scratch, together.
We want to start from scratch: design and laser-cut the frame, choose the electronics, put it all together, and learn how to test it. The kits I’ve seen seem geared toward indoor flying. We want to explore what it takes to build something that can venture outside, with parts we choose and a design we can keep improving.
The wooden frame is part of the experiment. When the inevitable crash happens, we’ll have our own files to return to. We can cut a replacement, adjust the design, and try again.
Every attempt is part of the story.
I’m documenting the whole journey: the decisions, the mistakes, the first tests, and—hopefully—the first flight. Neither of us is arriving as an expert. Figuring it out together is the point.
Eventually, once we’ve built, tested, and refined WoodHawk, I’d like to offer the plans for sale so other makers can build their own.
For now, it starts with a father, a daughter, a laser cutter, and an idea we want to see fly.
BILL OF MATERIALS
What goes into WoodHawk.
This is a planning checklist, not a confirmed shopping list. The v1.11 layout establishes a four-motor frame; component models, remaining quantities, and compatibility are still to be confirmed. Optional systems may not be needed. No purchase or affiliate links are included.
| System | Component | Quantity | Selection | Decision needed |
|---|---|---|---|---|
| Structure | Laser-cut wooden frame / airframe | 1 assembly | Design v1.11; untested | Planned 290 × 290 × 65 mm; sample fit and material details to confirm |
| Propulsion | Motors | 4 planned | Not selected | Motor specification and compatibility still to confirm |
| Propulsion | Propellers | TBD | Not selected | Diameter, pitch, clearance, and motor compatibility |
| Power | Electronic speed controller(s) | TBD | Not selected | Layout and electrical ratings to match the power system |
| Control | Flight controller | TBD | Not selected | Firmware support, mounting, and required interfaces |
| Control | Radio receiver | TBD | Not selected | Protocol and compatibility with the chosen transmitter |
| Power | Flight battery | TBD | Not selected | Chemistry, voltage, capacity, connector, and mass |
| Power | Power distribution / regulator | TBD | Not selected | Determine whether integrated or separate hardware is needed |
| Assembly | Wiring, connectors, and insulation | TBD | Not selected | Wire sizes, connectors, and routing after layout is defined |
| Assembly | Hardware and vibration isolation | TBD | Not selected | Fasteners, spacers, mounts, and retention method |
| Ground equipment | Radio transmitter | TBD | Not selected | Confirm what is already owned and receiver compatibility |
| Ground equipment | Battery charger | TBD | Not selected | Compatibility with the selected battery |
| Optional | Camera / video system | TBD | Not selected | Only if FPV or recording is part of the build |
| Optional | Navigation / telemetry | TBD | Not selected | Only if required by the intended flight features |
WHAT COMES NEXT · PLANNED WORK
From sample cuts to first flight.
These are the next steps, not completed milestones. I’ll add photos, measured weights, and test results as we work through them.
- Sample cuts & part fit. Laser-cut sample pieces and test-fit the parts as electronics are selected and become available.
- Full frame & dry fit. Laser-cut the full build, then dry-fit the frame assembly.
- Laminate & clean up. Laminate the arms, complete final sanding, and clean up the frame.
- First weigh-in. Weigh the bare frame before applying a finish.
- Shellac & cure. Apply two light coats of spray shellac, allow it to cure, then weigh the frame again.
- Electronics & weight. Assemble the electronics and weigh the complete assembly again.
- Motors, then first flight. Test the motors before attaching propellers. After motor testing, move toward propeller installation and a first flight attempt.
Follow the workshop.
Find DartyWorks on Instagram for a look at the work behind the scenes.
Follow @dartyworks